Top 5 Settings That Will Improve Your Underwater Photography
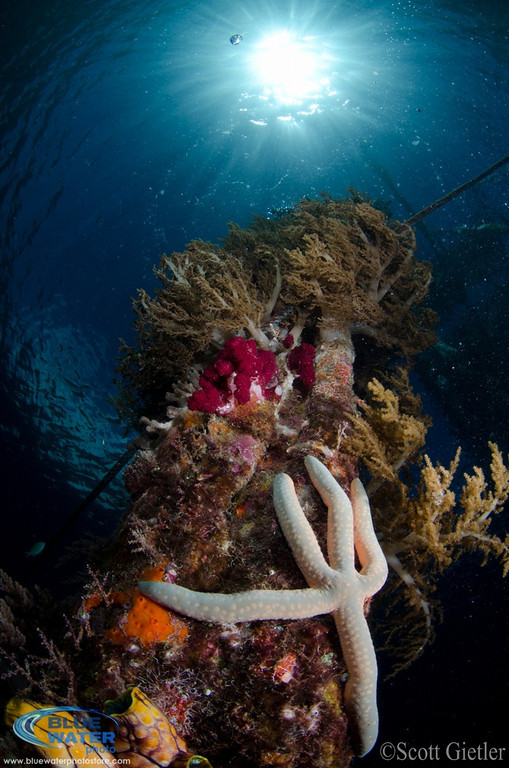
Starfish on jetty photo - F18, 1/320th, ISO 100, Nikon D7000, Tokina 10-17mm lens at 10mm
1) Shoot Manual
Ask any professional photographer what you can do to be a better photographer and the first thing the vast majority will tell you is to shoot manual. What they’re really telling you to do is to take control of your camera. This is the single most beneficial thing you can do to improve your photography, both underwater and top-side. Read more about manual settings underwater.

Oil rigs in California, F8, 1/25th, ISO 250.
Shooting manual really means understanding the relationship between shutter speed, aperture, and ISO. By getting a good handle on each of these concepts, and especially on how they relate to each other, you’ll understand how your camera works, when to change a setting for a creative effect and how to compose your images using photographic techniques. This is the single most important set of concepts you can learn as a photographer, and there are many articles that explain these settings in detail.
Reef in Anilao
2) Manual Flash
When you get right down to it, photography is all about light. The settings on your camera change how that light gets to the sensor. If you can also control your light sources, that’s one more aspect of the image you can dictate.

Barracuda on the Liberty wreck in Bali
Think about how a magazine photographer uses high-end flash systems combined with softboxes and umbrellas to create an image. That same concept works underwater with how much light you tell your strobes to produce and where you place those strobes. Think about how you want to create an image and then do what it takes to make that happen.
Cormorant on the oil rigs
3) Focus Focus Focus
Generally speaking, the more expensive the camera gets, the more focusing options you gain access to. Because every camera is going to have various modes and settings available, we’re going to talk generally here about two settings that you should consider using if you have access to them.
The more common of the two goes by many names. Whether it’s called Continuous-Servo (Nikon), AI Servo (Canon) or tracking focus (compact/mirrorless cameras), they both do much the same thing – track a moving subject. If you’re subject is a stationary or slow moving macro subject, stick to Single-Servo (Nikon), One-Shot (Canon) or your camera’s equivalent. However, if you’re following a moving subject, especially one that moves quickly like a seal or dolphin, make sure your focus is set to track.

Angel shark at catalina island
The other setting is backbutton focus. If you’re shooting on a DSLR, odds are you’re pressing your shutter button half-way down to determine focus and exposure before fully pressing it to take your image. Backbutton focus assigns the focusing aspect of this routine to a button on the back of the camera (hence backbutton) and removes it from the shutter.
This effectively duplicates manual focus, which is great for underwater photographers who might have limited access to manually focusing their lens underwater. It also means you don’t have to refocus everytime you let go of the shutter because you lock it in using the back button. As long as you and your subject maintain the same distance, your focus is locked on your subject.
Lastly, this allows you to stay on Continuous/AI-Servo mode almost all the time. You just hold the focus button down when you want it to track and let go when you want the focus locked. This is great when the water is surging and you want to use the tracking focus to stay with a subject. Read more about focusing fast underwater.
4) Histogram
The underwater environment is distracting to say the least. You’ve got to keep an eye on your buoyancy, air, the currents, and your buddy among other things. Add to that finding a subject you want to shoot and dialing in your settings and you’ve got a pretty chaotic environment to shoot in. Why not make evaluating the images you’re taking a little easier?
The Histogram is essentially a bar graph display that gives you an idea of the exposure of an image when you review it. For an even exposure, you’d want the histogram to make a nice hill from one edge to the other. This isn’t to say that a graph showing lots of dark or light is bad if that’s what the subject calls for. A white rabbit in front of a snowy background wouldn’t contain much middle or dark information, but might still be a great photo.
The importance here for underwater usage is the ability to quickly look at the graph and determine if your exposure is where you want it. Most often you’ll be looking for an even exposure without any loss of information. The histogram can give you that at a glimpse so you can adjust quickly before your subject swims away. Usually all it takes is a changing a menu option to turn this on. Read more about using histograms underwater.
Focus point was placed on the rhinophores
5) Single Spot Focus
Another focus setting to use, if you aren’t already, is a single focus point. The idea here is that the more you narrow down the focus point, the more you can control your composition. As Michael Zeigler says “you can move the focus point and be very specific about what you want to focus on. You leave nothing up to chance.”
One common technique is to use the center point on your camera to focus and, once you have the focus locked, you can move the subject to another point in your frame that creates a better composition. Play with your focus points and see what works best for you.
Bonus Setting – High ISO
Many photographers who learned on film are used to the idea that an ISO higher than 400 means lots of noise. These days that is simply not the case. With each new generation of camera, the ISO setting can be set at a higher number without introducing as much grain as the generation before. This is because the quality of the sensor keeps getting better.
This means that your options in low light situations have drastically improved, and will only get better as we go into the future. That being said, there’s generally still a point you don’t want to go past or you’ll see lots of noise. Experiment a little with your ISO settings and find a point where you don’t like the amount of noise. Then stay at least one setting below that. Read more about using ISO underwater.
Further Reading
RECOMMENDED ARTICLES
SUPPORT THE UNDERWATER PHOTOGRAPHY GUIDE:
The Best Service & Prices on u/w Photo Gear
 Visit Bluewater Photo & Video for all your underwater photography and video gear. Click, or call the team at (310) 633-5052 for expert advice!
The Best Pricing, Service & Expert Advice to Book your Dive Trips
 Bluewater Travel is your full-service scuba travel agency. Let our expert advisers plan and book your next dive vacation. Run by divers, for divers.


