Macro & Super Macro Underwater Photography Made Easy With a Snoot
Why using a snoot is difficult?
I started taking photos underwater two years ago. During my first intensive underwater photography in Anilao, Philippines, I noticed the advantage of using a snoot for controlling the light of a strobe. I also noticed how much its users struggle to direct it and align the light beam with the object and simultaneously focus.
I joined another Bluewater Travel macro photography workshop in December, 2019, and I decided to use a snoot. Before the trip I did some tests, diving in Eilat, Israel, which were not that successful. It was difficult to align the focus point, to change the angle of the light beam, and once you succeeded, many times the strobe and snoot moved due to gravity.
The basic problem was mounting a heavy strobe with a snoot on a long structure made of 2 arms with three clamps, which needs to be rigid enough to withstand gravity, but loose enough to enable the photographer to shift positions smoothly in a controlled way.
The Wolf* mounting method that eliminates most difficulties
The Wolf method, which I describe here, solves the problem. The key point is to replace the single arm that is attached to the housing by a rigid triangle structure which is made of two long (8” to 12”) arms that are attached to the housing and a short additional arm, held together by a triple clamp. This structure provides the rigid basis upon which the strobe is hung, utilizing an additional 5” arm.
*Mounting method by Ze’ev (Wolf* in English) Kirshenboim
The key advantages of the Wolf method
• Solid and steady
• Easy to change the distance from the object photographed and re-align the light beam
• Easy to switch between front, top, back and side illumination
• Easy to modify the angle of the light beam
• Works very well also with super macro
• Easy to capture moving critters (!)
• Easy to mount even with two diopters. See two images below.
• Easy access to the strobe dials (at least with the front lighting)
Using Wolf mounting commits the photographer to use the snoot or a single strobe for the entire dive. That said, my (admittedly short) experience is that the images with the snoot are so much better that I did not want to switch back to one or two strobes without a snoot.
I used a strobe with focus light and a snoot with focus light. It is recommended, but not mandatory. The method can be used also with a fiber optics snoot without a focus light. The fine-tuning part of the procedure below will be different, and I leave it to the advance user who uses such a snoot to figure it out by themselves.
Setting up the system
The following instructions for setting up your system are outlined in the image above. Prior to getting into the water:
a. Construct a symmetrical triangle base, made of arms #1,2. This is illustrated three images above. It is recommended to use two long arms (arms 1,2). The longer the arms, the longer the distance to the object and the easier it is to access the strobe control dials. I used 10” as depicted in the images.
b. Connect arm #3 using the triple clamp #3. Tilt the arm forward as much as the clamp allows.
c. Connect arm #4, a 5” arm, using clamp #4.
d. Mount the strobe using clamp #5. This is the clamp that is used the most to modify the snoot light beam orientation.
e. Fine tune the orientation of light beam so that
- It illuminates a point somewhere along the focus line
- The plane that is defined by the light beam and the line of focus is vertical
f. Tighten clamps 1,2 to the maximum. In the water, there is no need to loosen these clamps, unless you want to switch between relative short focus distance and a very long one or for back lighting and illuminate the object from the back. In such a case loosen up clamp #1&2 a little, enough to be able to tilt the triangle down by holding the housing and pushing forward clamp #3.
g. Tighten clamps #3, 4 to the maximum. Based on my (short) experience there is no need at all to modify the orientation of arms 3 & 4.
h. Take a test shot and verify that the light is centered around the focus point.
i. Increase the distance between the camera and the object. Push the strobe gently forward and make sure that it reaches the new focus point without moving aside. If it does, repeat step f above.
j. Tighten clamp #5 to the maximum.
You are ready to get to the water (or board the boat).
Once in the water:
a. Turn on the camera and the strobe and the focus light
b. Make a test shot on a still object
c. Untighten Clamp #5 a little and make the necessary adjustments. This is the only clamp that is not fully tightened and is the only joint needed to be modified to change the distance or to top lighting.
Top lighting
To change from front to top lighting, rotate the strobe. If the distance to the object is long, then you might have to loosen clamps #1, 2 a little and tilt the triangle forward by pushing clamp # 3 forward.
Again, make sure that the light beam is aligned with the focus point when the strobe is moved forwards and backwards.
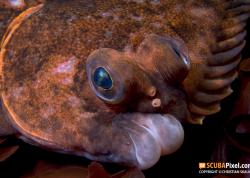
In the gallery, I include images taken during my first intensive attempt with a snoot and the Wolf’s mounting method for macro and super macro images in Anilao, The Philippines.
Give it a try and enjoy. The chances are that it will significantly elevate your level of macro and super macro images.
Gallery
RECOMMENDED ARTICLES
SUPPORT THE UNDERWATER PHOTOGRAPHY GUIDE:
The Best Service & Prices on u/w Photo Gear
 Visit Bluewater Photo & Video for all your underwater photography and video gear. Click, or call the team at (310) 633-5052 for expert advice!
The Best Pricing, Service & Expert Advice to Book your Dive Trips
 Bluewater Travel is your full-service scuba travel agency. Let our expert advisers plan and book your next dive vacation. Run by divers, for divers.


